

Bathroom Remodel Plumbing Guide for Palm Coast: What Happens When You Follow One Master Bath From Demo to Trim-Out?
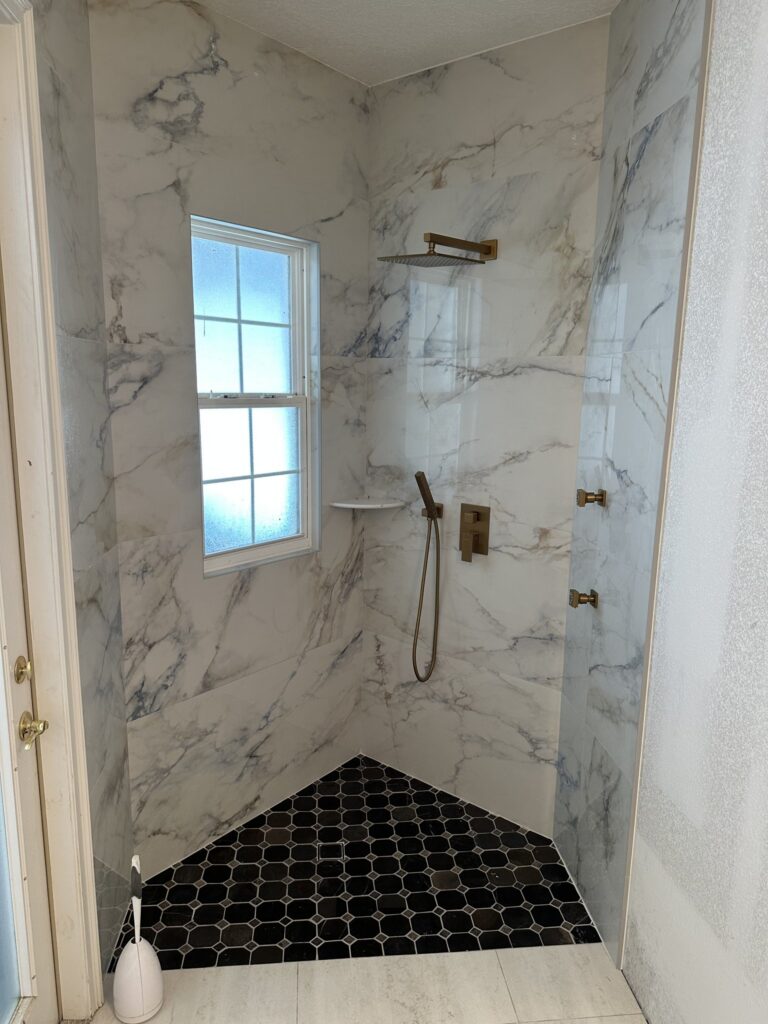
- A bathroom remodel has two plumbing phases: rough-in, with everything open, and trim-out, after tile and cabinets. Everything in between waits on the inspection.
- This master bath moved the shower drain eighteen inches on the slab, converted a garden tub to a curbless shower, relocated nothing else, and took seven weeks.
- The surprises were under the tub: a cast-iron stub and a sub-slab line shallower than expected. Both changed a fitting, neither changed the plan.
- Every phase below has its price, its inspection, and its decision, in the order a homeowner faces them.
The situations described here are composites drawn from the types of jobs and decisions we encounter regularly. Names and specific figures are illustrative.
Most of what I know about remodel plumbing I can explain with one bathroom, so this bathroom remodel plumbing guide follows one: a master bath in a 1996 Palm Coast house with a corner garden tub nobody used, a shower stall with a round drain in the center, a single vanity, and a toilet in a closet. The homeowners wanted a curbless walk-in shower where the tub had been, a double vanity on the same wall, and a comfort-height toilet. They wanted it done right, permitted, and finished before their family came for the holidays. It took seven weeks and every phase in this guide.
I have written a separate post on each phase and linked them where they belong. This is the spine: what happened, in order, from the day the tub came out to the day I turned the shower on for the last time and handed over the permit card.
Before demo: the walkthrough and the quote
Every remodel starts with a $96 walkthrough that is applied to the work. On this one I ran a camera down the tub and shower drains to see where the lines went under the slab, marked their paths on the floor with a locator, scanned the slab for post-tension cables and found a conventional reinforced slab, checked the water heater, and looked at the vent stack in the attic to see where the vanity vent tied in. Forty minutes. From that I wrote an itemized quote: the slab drain relocation for the new shower, the tub-to-shower conversion, the shower valve, the double vanity drain and supplies on the existing wall, new stops throughout, the permit at cost, and the trim-out. The Remodeling Magazine Cost vs. Value report[1] for the Jacksonville metro puts a midrange bathroom remodel well into five figures all-in; the plumbing was the share of that the service page ranges describe, and I told them tile and glass would be larger. How that quote compares to an online calculator, line by line, is the post on the calculator that said $3,000 and the quote that said $7,000.
Two decisions happened at the walkthrough that saved weeks later. They chose every fixture that day, including the shower valve, whose body has to be in the wall at rough-in, and I pulled the permit that week with the rough-in inspection already requested for the day I expected to finish.
Week one: demo, and what was under the tub
The general contractor’s crew took out the tub deck, the tub, the shower stall, the vanity, and the toilet in two days. Under the tub was the first surprise: the last foot of the tub drain, at the trap, was cast iron, with PVC beyond it. Builders in Palm Coast in the mid-1990s sometimes used cast-iron traps and stubs with PVC lines, and I see it enough that it does not change a quote, just a fitting. The second surprise was at the shower: the existing two-inch line under the slab was shallower than average, which mattered for the slope of the new drain. Both went on a text to the homeowners that afternoon with photos, because a remodel with no surprises does not exist and a remodel with no communication about them is the one that goes wrong.
Week one, continued: the slab
The curbless design put a linear drain against the back wall, eighteen inches from the old round drain. I saw-cut a trench along the marked path, broke out the concrete, and dug the sand. Where the new line met the old, the cast-iron stub got a shielded transition coupling to PVC, which the Florida Building Code, Plumbing[2] edition allows for exactly this. The new two-inch trap and drain body went in at the elevation the tile contractor’s mortar-bed spec required, and the shallow existing line meant the slope worked with about two inches to spare, which I confirmed with a level and a string line before gluing anything. The tub’s inch-and-a-half drain, which a shower cannot use, was removed entirely; the new shower’s two-inch drain stood alone on its own trap. That day and a half, with what would have stopped it, is the post on moving a shower drain eighteen inches on a Palm Coast slab, and the drain-size rule is the first of the four changes in the post on what changes in the plumbing during a tub-to-shower conversion.
Week two: rough-in in the walls
With the trench open and the walls stripped to studs, the rest of rough-in took two days. The shower valve body, a thermostatic unit, set at forty-eight inches and plumb, at the depth for the tile thickness the contractor had specified. The shower head drop at eighty inches and a second outlet for a hand shower on a slide bar. Solid blocking let into the studs at grab-bar heights, on every shower wall, whether or not bars were going in, because the 2010 ADA Standards for Accessible Design[3] heights are the right heights and blocking cannot be added after drywall; that decision, and when it becomes a full accessible bathroom, is the post on walk-in shower versus walk-in tub for seniors. The double vanity’s drain arm and the second set of supplies on the existing wall, tied to the existing vent, which is why keeping the vanity on that wall was the single biggest saving on the quote. New quarter-turn stops at every location. Everything capped and under pressure.
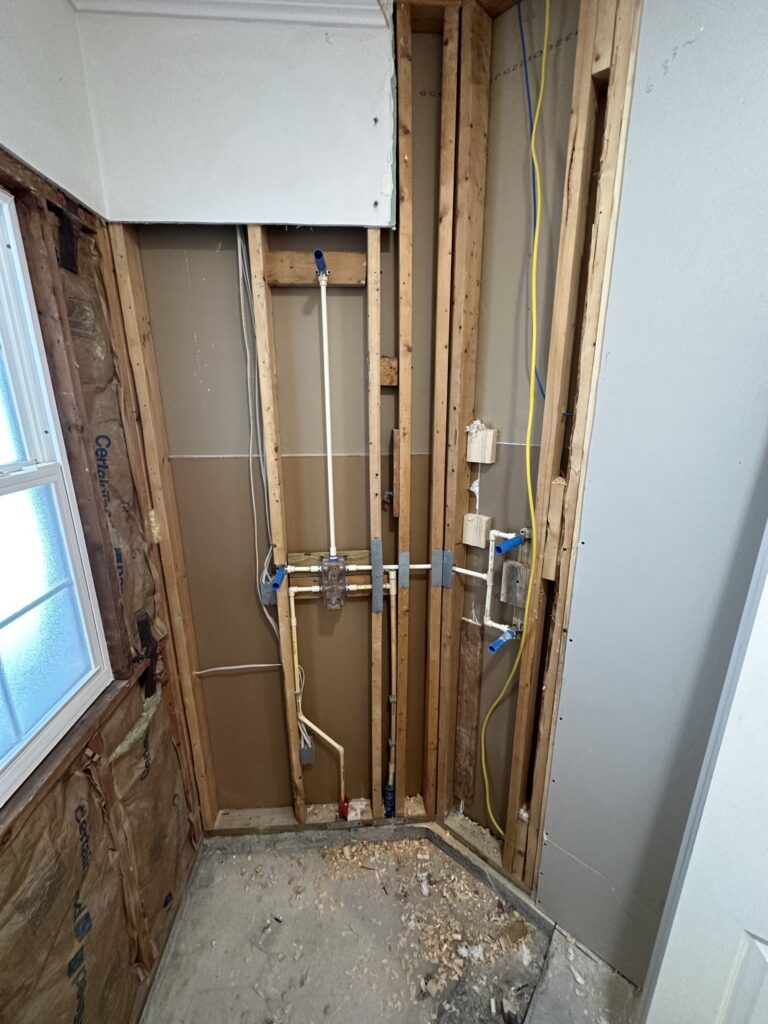
The Florida Building Code, Residential[4] edition governed the blocking and the framing around the trench; the plumbing code governed the rest. The rough-in inspection was already on the city’s calendar for Friday.
Week two, Friday: the rough-in inspection
The City of Palm Coast Building Division[5] inspector came Friday morning, looked at the trench with the trap and coupling exposed, checked the slope with his own level, looked at the valve body and the vent tie-in, checked the pressure gauge on the capped supplies, and signed the card. Fifteen minutes. That fifteen minutes is the hinge of the whole schedule: nothing can be covered until it happens, and the tile contractor, drywall, and everything after are booked against it. Because it was requested when the permit was pulled, it landed on the day rough-in finished. When it is requested at completion instead, it lands a week or more later, and that week cascades through every trade behind it. The remodel where that happened, and where three weeks went, is the post on rough-in versus trim-out on a timeline that slipped. What happens years later when there is no inspection at all is the post on the unpermitted bathroom caught at sale.
Friday afternoon I compacted the sand, poured the trench back flush, and troweled it. The drywall crew started Monday.
Weeks three through five: the trades between the phases
This is where a homeowner sees no plumber and the plumbing is nowhere near done. Drywall, then the shower pan: the tile contractor built a sloped pan over a waterproof membrane clamped to the drain body I had set, and I came by for twenty minutes to confirm the clamping ring was seated and the drain height matched the pan before he tiled over it, because a drain a half inch high in a curbless floor is a puddle for the life of the bathroom. Then the shower walls, the floor in large-format tile sloping to the linear drain, the vanity cabinet, the countertop templated and fabricated. Three weeks. The fixtures sat in boxes in the garage the whole time, which is the point of ordering them before rough-in.
What the trench said about the house
A remodel is the only time anyone looks under a slab on purpose, so I use it. This house’s original plumbing was PVC drain lines with cast-iron traps at the tub and shower, copper supplies in the sand, and a single vent stack serving the whole master bath. That is a normal 1996 Palm Coast build and it told me three things worth writing on the invoice. The copper under the slab was sound where I saw it, with no green scale or pitting at the trench, which is good news for a house that age; a slab leak on the hot side is the most common reason I open a floor in this city outside a remodel. The cast-iron traps were in the condition cast iron gets after thirty years here, rough inside but intact, and the one I removed at the tub was the only one that had to go. The vent stack in the attic was PVC and had room for a second tie-in if the homeowners ever add a fixture. None of that changed this job. All of it is in the folder, because the next plumber who opens this floor, or the buyer’s inspector who asks about it, should know what is down there without cutting concrete to find out.
Week six: trim-out
One day. The shower trim onto the valve body, the rain head and the hand shower on the slide bar, the linear drain grate. The two widespread faucets on the double vanity, connected to the new stops with new braided supplies, the pop-up drains and the trap assembly under the cabinet. The comfort-height toilet set on a new wax ring and connected. Then every fixture run, every connection checked dry, the shower run for ten minutes to watch the floor drain to the slot with no ponding. The EPA WaterSense[6] head and faucets they chose are 1.8 and 1.2 gallons a minute and felt like more, which is the case with the good ones. The next morning, the final inspection: the inspector ran the fixtures, checked the toilet and the traps, and closed the permit. The card went to the homeowners in the folder with the invoice, the fixture warranties, and the photos of the trench, because that folder is what makes the bathroom real when they sell.
The decisions, in the order a homeowner faces them
What moves and what stays. Every fixture that stays where it is costs a fraction of one that moves. The shower drain moved because the design needed it; the vanity stayed because it did not. That single choice was a third of the difference between the first quote and the final one.
Which fixtures, and when. The shower valve by rough-in, because the body goes in the wall. Everything else ideally by rough-in too, so trim-out is a day and not a wait. Chrome and brushed nickel from major brands ship; matte black and brass from small lines backorder.
Permit and inspection timing. Pulled at the start, inspection requested for the expected rough-in date. The permit is a fee at cost and two visits; the timing is the schedule.
Tub or no tub. A conversion is right when another tub stays in the house. Theirs did, in the hall bath, which is what Palm Coast buyers ask about.
Accessibility now or later. Blocking is free when the wall is open. A bench, a hand shower, and a thermostatic valve cost little more than the alternatives and make the bathroom work for the next twenty years of the people using it.
Island or wall, if it is a kitchen. The same logic applies one room over: an island sink is a trench and a loop vent, and it is worth it when the island is the point. That job is the post on kitchen island plumbing on a slab with no wall to vent through.
One year later
I went back the following fall. The rain head was spraying sideways from eleven-grain scale, the matte-black faucets had water spots, and the tub filler on the freestanding tub they had put in the corner where the garden tub used to be had a stiff diverter. Two were the water and one was warranty, and the routine that keeps them ahead of it is the post on maintaining new bathroom fixtures after a remodel in Palm Coast’s water. The plumbing under the floor, which nobody has seen since the inspector, has not needed anything.
What people ask about remodel plumbing, in one place
What does a plumber do in a bathroom remodel? Rough-in with the walls and slab open, then trim-out after tile and cabinets, with an inspection after each. Drains, vents, supplies, valve bodies, then fixtures.
How long does the plumbing take? Three to five days of rough-in and one to two of trim-out, across a six-to-eight-week remodel. The rest is other trades and the inspection schedule.
What does it cost? The service page ranges: same-footprint rough-in in the low four figures, with a slab drain relocation in the mid four figures, finish set per bathroom on top. Fixtures, tile, and glass are separate.
Do I need a permit? If anything moves, yes. The inspector sees it open.
What should I decide first? What moves and what stays, then the fixtures, then the schedule. In that order.
What the master bath is now
A curbless shower with a linear drain against the back wall, a bench, a hand shower on a slide bar, a thermostatic valve, grab-bar blocking behind the tile, a double vanity on the wall it was always on, a comfort-height toilet, and a freestanding tub in the corner where the garden tub used to sit. The family came for the holidays and used it. The permit card is in a folder. Under the floor there is a coupling on a cast-iron stub that will outlast the house and a two-inch trap set to slope that the inspector checked with his own level. That is what a bathroom remodel’s plumbing is: two phases, one inspection each, a few decisions in the right order, and a trench nobody will ever see again.
If you are planning one and want this bathroom remodel plumbing guide applied to your floor plan, the walkthrough is where it starts. Our remodel plumbing service in Palm Coast does it under the $96 service call, applies it to the work, itemizes every phase, and pulls the permit with the inspection already on the calendar.
Sources
- Remodeling Magazine: Cost vs. Value Report (Jacksonville metro)
- Florida Building Code, Plumbing (8th Edition, 2023), Florida Building Commission
- 2010 ADA Standards for Accessible Design, U.S. Department of Justice
- Florida Building Code, Residential (8th Edition, 2023), Florida Building Commission
- City of Palm Coast Building Division: permits and inspections
- EPA WaterSense